
Affiliate Disclosure: This post may contain affiliate links. If you buy through them, I may earn a commission at no extra cost to you. For more information please refer to the Disclaimer, Terms and Conditions, and Privacy Policy.
This post is all about curtain pleat tape for DIY pinch pleat curtains.

Transforming your curtains from ordinary to extraordinary has never been easier with this no-sew DIY guide to adding pleating tape. I just think pleated curtains look so polished and elegant, but found that pleated curtains are typically extremely pricey. In my quest to find affordable curtains, I found some really beautiful and totally affordable Amazon curtains. Unfortunately, the one thing they were missing was curtain pleating tape. Check out my post: BEST Amazon Curtains Under $40 to see the Amazon curtains that I added curtain pleat tape to, and also highly recommend!
I was determined to get the coveted pinch pleated curtain look, but didn’t want to have to sew anything (sewing is a little out of my wheelhouse). So, whether you’re a seasoned DIY enthusiast or a novice looking to spruce up your space, this simple yet effective tutorial will teach you how to add curtain pleating tape to your curtains for a quick and easy stylish upgrade. #CurtainPleatTape #CurtainPleatingTape #DIYPleatedCurtains #NoSewPleatedCurtains #PleatedCurtains
This post is all about curtain pleat tape for DIY pinch pleat curtains.
Table of Contents
- DIY Curtain Pleat Tape: Supplies
- DIY Curtain Pleat Tape: Step-by-Step Tutorial
- DIY Curtain Pleat Tape: Results
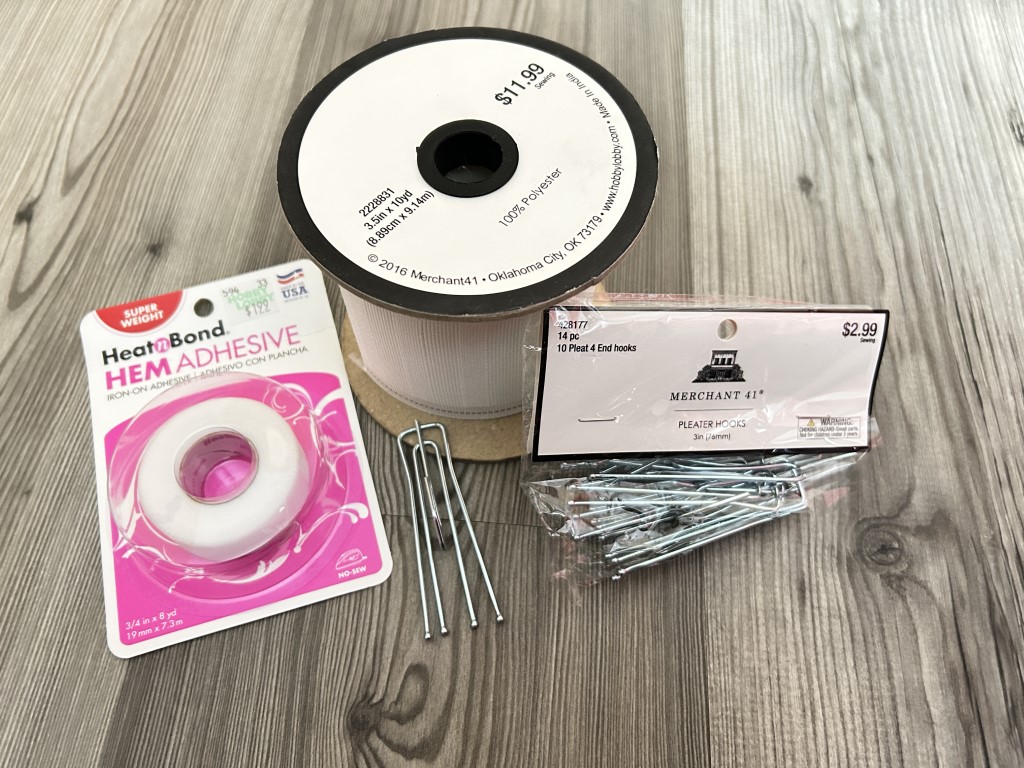
DIY Curtain Pleat Tape: Supplies
You really don’t need very many supplies, because this is EASY. Here is what you need:
- Pleating Tape
- Pleater Hooks
- Hem Adhesive
- Clothes Iron
- Ironing Board
See below for more detailed information about the exact supplies I used.
Pleating Tape
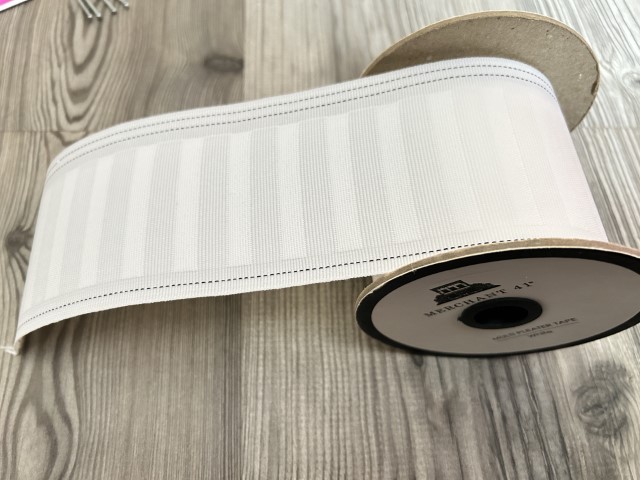
I purchased pleating tape from Hobby Lobby. Hint: be sure to buy it when Hobby Lobby is running the 40% off on Ribbon and Trim. It was around $7 per 10 yard spool. I only needed 2 spools to do all my curtain panels. I bought the Multi Pleater tape, so it had pockets that were evenly spaced, which allows for obtaining many different pleat styles. Here is the link to the curtain pleating tape at Hobby Lobby: White Multi Pleating Tape.
Amazon also has plenty of good options. I just prefer the multi pleating tape because you have so many more options to create pleat styles. Here are a few good options from Amazon
Olgamo Pure White Deep Pinch Pleat Tape (10-Yards)

MJMP Pleat Tape for Curtain Heading Vintage Style Small Size with 20 Pcs Stainless Steel 4 Prong Curtain Pleat Hook Clip

LCXX 3.35 Inch Wide Multifunction Curtain Tapes for Home Sewing Heading Deep Pinch Pleat Tape DIY Rod Pocket Hanging Hook Curtains 20 Meter, Multicolor

Pleater Hooks
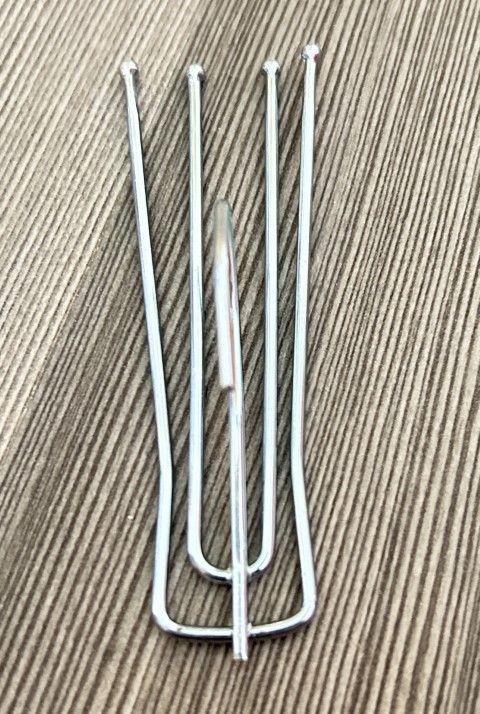
- You’ll need to purchase some pleating hooks. You’ll want to get the three prong hooks. If you purchase your pleating tape from Amazon from one of the above links, they come with the pleater hooks. I purchased my pleater hooks from Hobby Lobby here: Hobby Lobby Pleater Hooks. You can get pleater hooks really cheap on Amazon too. Here are a few Amazon pleater hook options:
100 pack: baotongle Stainless Steel Curtain Pleater Tape Hooks

50 pack: baotongle 50 pcs Stainless Steel Curtain Pleater Tape Hooks

75 pack: Millennial Essentials Stainless Steel Curtain Pleater Tape Hooks 75 Pack

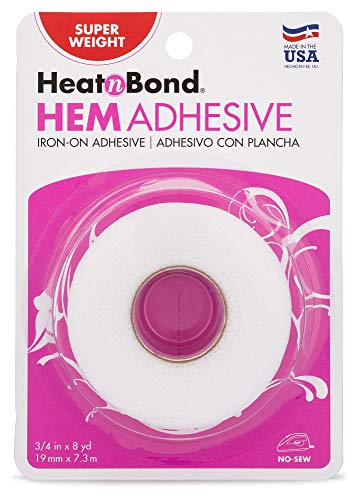
Heat-n-Bond Hem Adhesive – Iron on Adhesive
Now, that you have all the supplies you need, let’s get into the tutorial on how to add the pleat tape to your curtains!
DIY Curtain Pleat Tape: Step-by-Step Tutorial
Now for the easy part, adding the pleating tape to your curtains!
Step 1: Prepare the curtains and iron.
Set up your ironing board, and lay the back side of the top edge of your curtain out on the board. Make sure it is nice and flat across the board. Turn your iron on to medium/high setting.
Step 2: Hem adhesive tape
Roll out the hem adhesive tape to the full width of the curtain. You will want to put one row of hem adhesive tape on the very top of the curtain where the pleater tape is going to go. You’ll also add a row of adhesive tape at the bottom of the pleater tape. *Hint- lay the pleating tape out on top of the hem adhesive tape to eyeball how far down to put the bottom row of hem adhesive tape. Depending on the width of your pleating tape, you may want to add another row of hem adhesive tape in the middle. My pleating tape was the 3.5″ wide, so I added three rows of hem adhesive tape.
Step 3: Pleating Tape
Roll out and cut the pleating tape to the width of the curtain panel. Lay the pleating tape over your hem adhesive tape strips. *Important Note: Be sure that you put don’t put the pleating tape on upside down. The openings to the pleat pockets should be at the bottom of the tape, not the top. Make sure the hem adhesive tape stays under the pleating tape and keep it straight and aligned with the top of the curtain. When you have it all laid out and everything is straight, you’re ready to iron.
Step 4: Iron the Pleating Tape
This part is pretty easy. All you need to do is hold the iron on the pleating tape for 8 to 10 seconds, or however long your iron takes to let the adhesive bond. Mine took about 8 seconds per section. Slowly progress down the curtain panel ironing over the pleating tape, making sure to keep everything straight as you go. Once done, lay the panel aside and let it cool off. *Note: while I ironed the pleating tape, it sort of rippled because I think it shrunk a bit when the adhesive heated up. I just made sure to hold the fabric and the pleating tape tight, and that helped. Once it all cooled off, that rippling pretty much went way.
Step 5: Add Pleat Hooks and Hang Curtains
That’s it! You can now add your pleating hooks, and hang your curtains. There are many different pleat styles, but I went with the traditional 1 prong per pleat pocket method. So, I simply put 1 prong of the hook in each pleat pocket. I left 5 pleat pockets between each pleat hook. See below for a sample of how I inserted and spaced my pleat hooks.
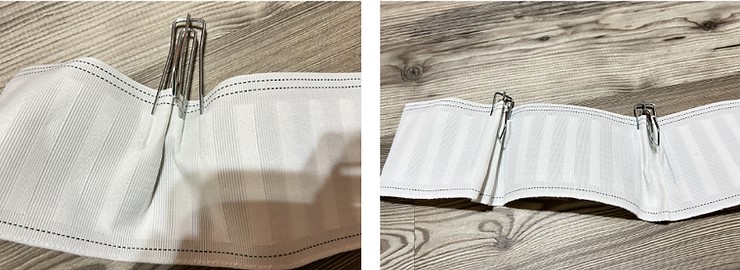
Pinch Pleat Method – 1 prong per pocket – 5 empty pockets between prongs
DIY Curtain Pleat Tape: Results
Here are a few photos of how mine turned out! What do you think?

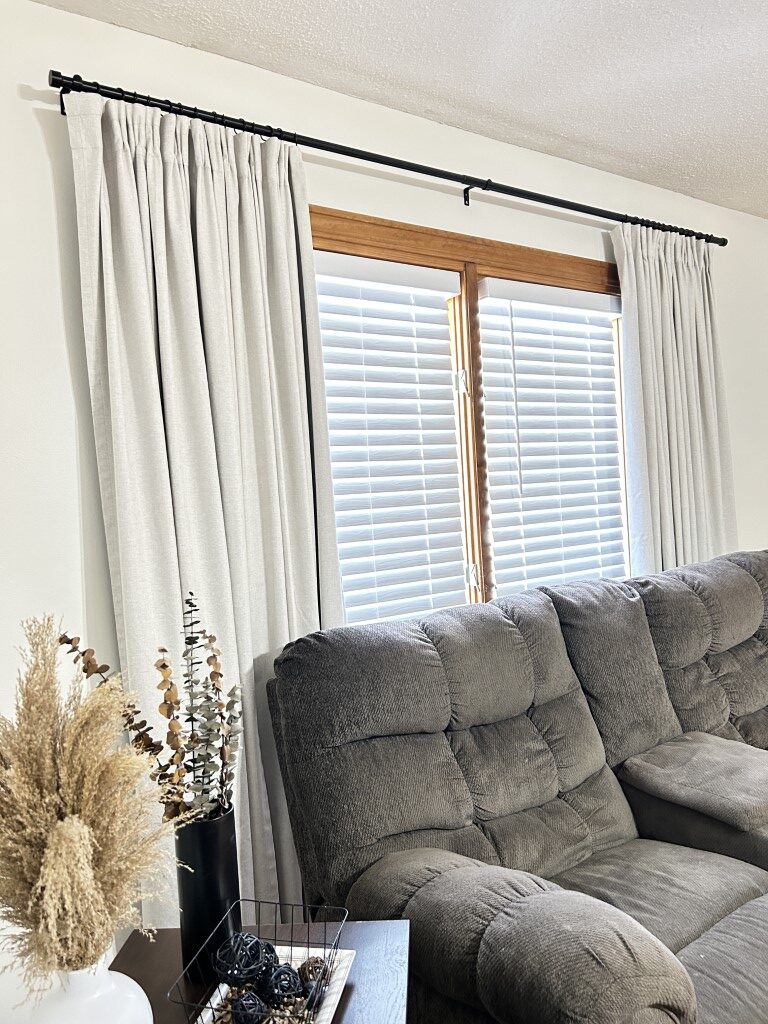
Not too bad, for such a simple method! Don’t forget to check out the awesome Amazon curtains that I added pleat tape to: BEST Amazon Curtains Under $40.
#AffordablePleatedCurtains #AddPleatingTape #PleatTape #AdhesivePleatingTape #EasyPleatedCurtains
This post was all about curtain pleat tape for DIY pinch pleat curtains.
Other posts you may like:
- BEST Amazon Curtains Under $40
- Budget-Friendly Elegance: Transform Your Space with Amazon Throw Pillow Covers – Easy, Affordable, and Stylish Upgrades!
- DIY easy whitewash brick fireplace
- The Very Best Amazon Sleek and Affordable Modern Black Sofa Table
Affiliate Disclosure: This post may contain affiliate links. If you buy through them, I may earn a commission at no extra cost to you.
Amazon Affiliate Disclosure: living-savvy.com is a participant in the Amazon Services LLC Associates Program, an affiliate advertising program designed to provide a way for websites to earn advertising revenues by advertising and linking to Amazon. For more information please refer to the Disclaimer, Terms and Conditions, and Privacy Policy.
