
Affiliate Disclosure: This post may contain affiliate links. If you buy through them, I may earn a commission at no extra cost to you. For more information please refer to the Disclaimer, Terms and Conditions, and Privacy Policy.
In this post you will learn how to build a DIY floating bed with lights for under $150.
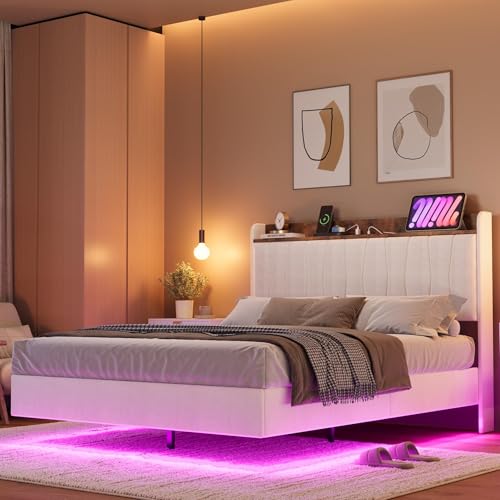
Transform your bedroom with an easy DIY tutorial and learn how to build a floating bed with lights for under $150! Have you ever seen or heard of a floating bed? My daughter recently saw a floating bed that had LED lights under it, and asked if we could build her a lighted floating bed. I must say, they are really cool looking. The bed frame looks like it is levitating “floating” off the ground, and the addition of LED lights underneath, just really amplifies the illusion.
Next step, research. We wanted to see how the floating bed is built, and what supplies and materials would be necessary. After researching, we found that there are quite a few different methods to build a floating bed, and it really depends on which floating bed plans make the most sense for you, your space, and your preferences. We discovered that building a floating bed would be pretty affordable, and it looked like a really fun and easy project to tackle. We also considered purchasing a floating bed with lights, and found a couple good options, which I will provide more detail about below. Ultimately, we thought it would be such a fun project, so we decided to go for it! *If you would rather purchase a floating bed frame, check out my top floating bed frame picks on Amazon!


Oh yes, one more thing. Of course my daughter showed her brother this “really cool floating bed with lights,” and he had to have one too! 🤣 So, instead of one, we will be building TWO custom lighted floating beds!
This project can easily be completed in one weekend. The part that takes the most time is letting the stain dry between coats. If you are painting your floating bed frame, that would speed the process up quite a bit.
Learn how to build a DIY floating bed with lights for under $150!
In this lighted floating bed tutorial we will be building our floating beds to accommodate “Full Size” mattresses. Please note that this supplies list applies to floating bed plans for full size beds. If you are building a floating bed for King, Queen, or Twin, please make sure to account for the adjustments to quantities of supplies, and any measurements and dimensions.
To build a custom DIY floating bed with lights you will need the following supplies: (this is the supply list to build ONE floating bed for a full size bed.)
DIY Floating Bed – Supplies List
- Screws – various sizes
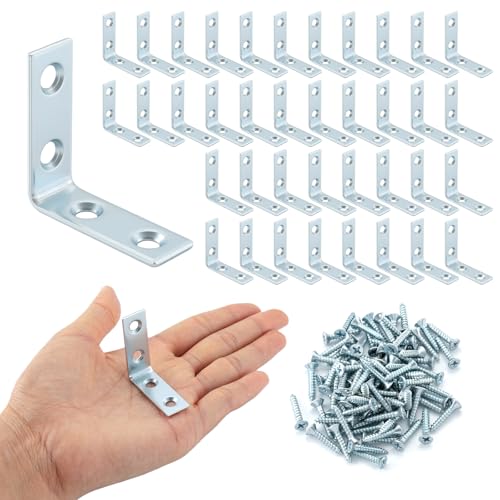
- Corner brackets
- Paint or Stain (whichever you choose). We used Old Master’s Wiping Stain in Dark Walnut
- Polyurethane (if you choose to stain the wood)
- Old Rags (if staining)
- Foam brushes (to apply polyurethane, if applicable)
- LED Lights – 50 feet
- Wood
- Qty 4 – 2×4 – 8′
- Qty 1 – 2×4 – 10′
- Qty 1 – 2×10 – 12′
- Qty 1 – 2×10 – 10′
- Qty 6 – 1×6 – 12′


Tutorial to Build a DIY Floating Bed With Lights
Here are the steps to build the DIY Floating Bed with Lights.
- Step 1: Measure Your Mattress and Headboard
- Step 2: Build the Bottom Base
- Step 3: Build the Bed Frame
- Step 4: Cut Slats
- Step 5: Cut Finished Edge Pieces
- Step 6: Stain or Paint your Finished Pieces
- Step 7: Optional – Stain or Paint the Bottom Base
- Step 8: Attach the Floating Bed Base to the Frame
- Step 9: Attach the Finished Edge Pieces to the Frame
- Step 10: Attach the Floating Bed Frame to Headboard
- Step 11: Add LED Lights to your Floating Bed
- Step 12: Attach the Slats to the Floating Bed Frame
- Step 13 (FINAL STEP): Put the Mattress in Place and ENJOY!
Step 1: Measure Your Mattress and Headboard
The first thing you need to do is measure your mattress. If you have a headboard that you plan to attach to the floating bed, you will also need to measure the headboard. The outside frame of the floating bed needs to line up with your headboard, and also be the correct width and length to accommodate your mattress. Keep in mind that mattresses are supposed to be a standard size, but they may not measure exactly what the standard size is. It is a good idea to go ahead and measure your mattress, so you can be certain the frame you build will fit perfectly with your mattress. Once you have the measurements for the frame, you are ready to begin building the bottom base.
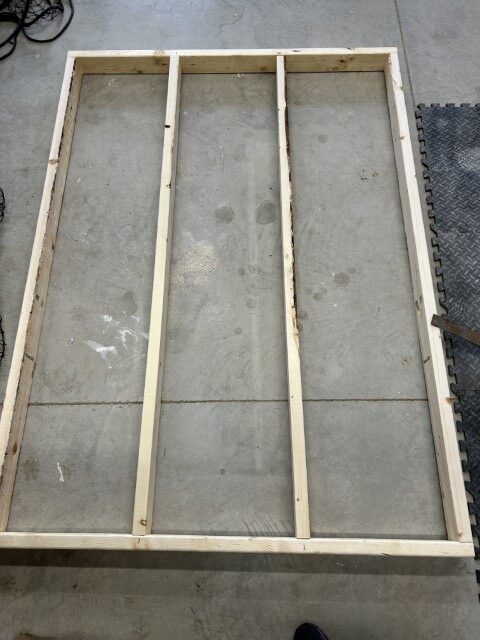
Step 2: Build the Bottom Base
The bottom base is the first step to building your DIY floating bed with lights. We used 2×10’s to build the bottom base, but you can also use 2×8’s. The reason we used 2×10’s was to get the frame up higher off the ground, so it would be high enough to fit with our existing headboard. If you can use 2×8’s, that would probably be better because it will sit lower to the ground, and will hide the bottom base a lot better.
The measurements we used for the bottom base was outside dims of 32″ x 54″. We also added two supports in the middle.
DIY floating bed with lights – Bottom base unit
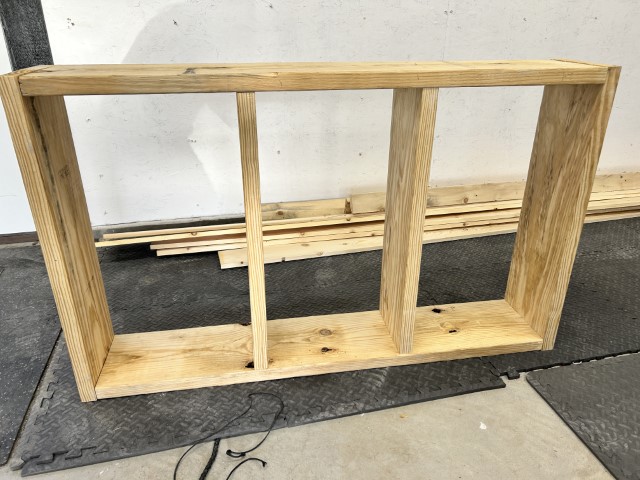
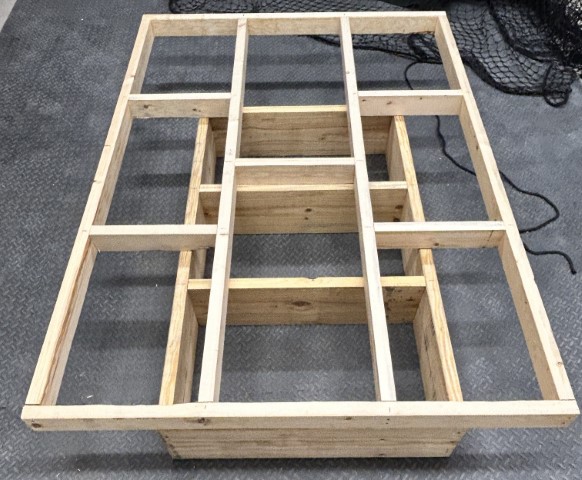
Step 3: Build the Bed Frame
Next, we are ready to build the bed frame. Be sure that you have the dimensions correct on your mattress. You need to build your frame with overall outside dimensions between 1/2″ to 1″ larger than your mattress length and width. This will ensure the mattress will fit correctly on the floating bed frame.
The measurements we used for our floating bed frame was outside dims of 54″ x 75″.
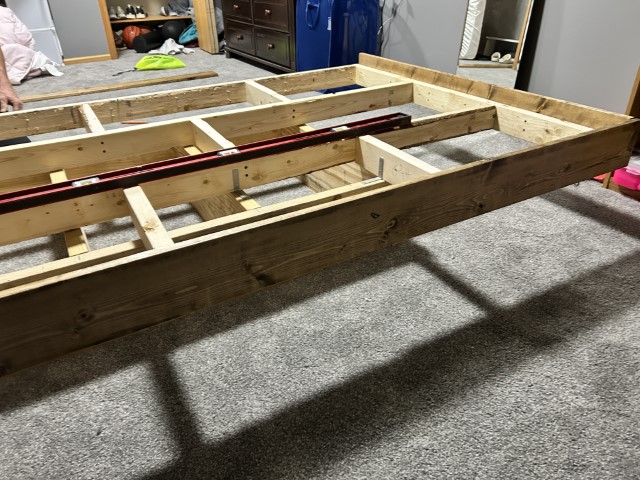
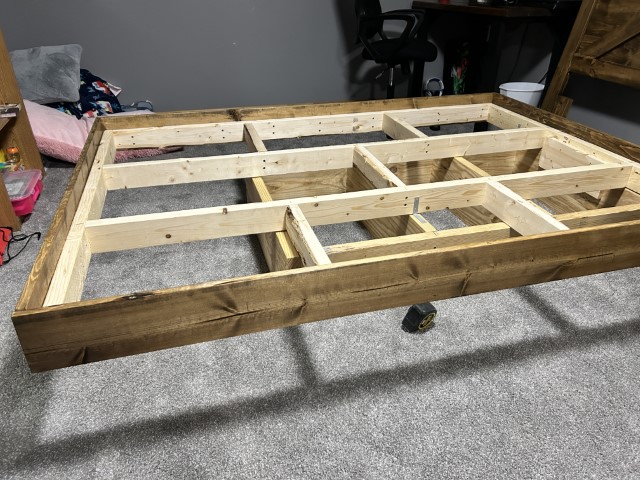
Building the frame is super easy. You will use the 2×4’s to build the bed frame. Simply measure, and screw the outside boards together. Then, go back and add two middle support boards, and 5 small supports, as seen in the photo below.
Floating Bed Frame – Outside Frame
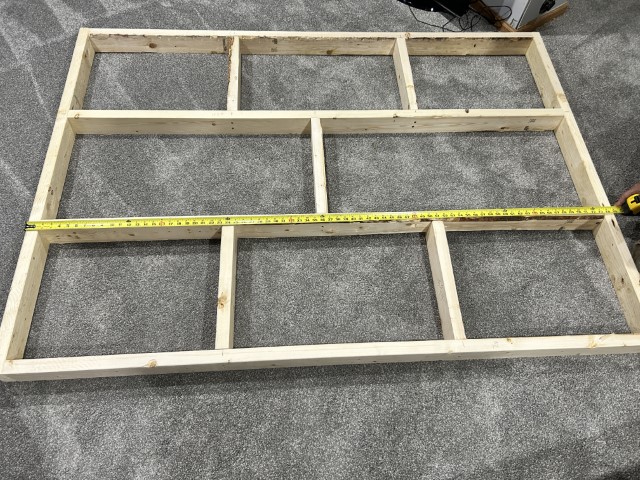
Floating Bed – Frame Complete
Step 4: Cut Slats
Now you are ready to cut your slats for your floating bed. You will use the 1×4’s for the bed slats. They should be cut to the width of the bed frame. We used 8 slats for the full size floating bed frame. You can just cut them and then lay them out to make sure they are going to fit. Once you have them all cut, you can lay them aside, until we are ready to attach them in a later step.
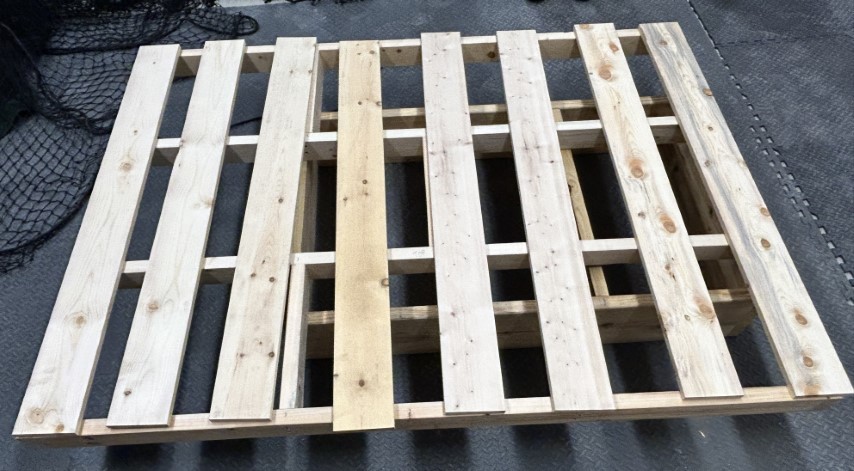
Floating Bed Slats: 8 Slats cut and ready to attach in later step
Step 5: Cut Finished Edge Pieces
You are now ready to cut the finished edge pieces using 1×4’s. These are the pieces that will be the visible part of the bed frame. Everything we have made so far, has not been visible on the frame. Cut each board to the outside dimensions of the bed frame. Remember to cut these boards precisely, as you want to be sure these pieces all come together nicely in the corners.
Step 6: Stain or Paint your Finished Pieces
At this point, you can go ahead and stain or paint the finished edge pieces. You can either stain/paint in this step, or you can wait until the finished edges are attached to the bed frame. We stained all of our finished edge pieces before we attached them because we felt it would be easier to do before they were attached. If you choose to stain the wood, be sure to give the boards a nice sanding before staining. Once you have your stain applied, let it dry the appropriate amount of time indicated on your stain. Be sure to check the recommendations for your particular stain, as all stains have different drying times. Then, add your favorite polyurethane top coat and let dry the recommended time.
If you are interested, the stain we used was Old Master’s Wiping Stain in Dark Walnut. We only applied one coat, as we were going for a lighter look.

Floating Bed -Staining the Finished Edge Pieces
Step 7: Optional – Stain or Paint the Bottom Base
We did not stain the bottom base. Since we used 2×10’s, the bed frame is a little higher off the ground, so when you are far enough away from the bed, you can see the frame a little bit. We may go back and stain it later, or we may just leave it. It’s not too bad, but it is visible.
Step 8: Attach the Floating Bed Base to the Frame
We’re getting so close to completing this awesome DIY floating bed! For this step, and all the remaining steps, we recommend you assemble in the location where it will actually be staying. It’s much easier to do it this way, then to try to move it later. So, gather all of the pieces and bring them into the room where the floating bed will be located.
Once you have everything brought into the room, you are ready to attach the base and the frame pieces. See photos for how to align the frame on top of the base.
Floating Bed: The front edges should be flush at the top (this is the headboard side)

Floating Bed – in final destination – aligning the frame on the base
Once you have the frame aligned on the base, you can use brackets to attach the frame to the base. We added 6 brackets (see photos).
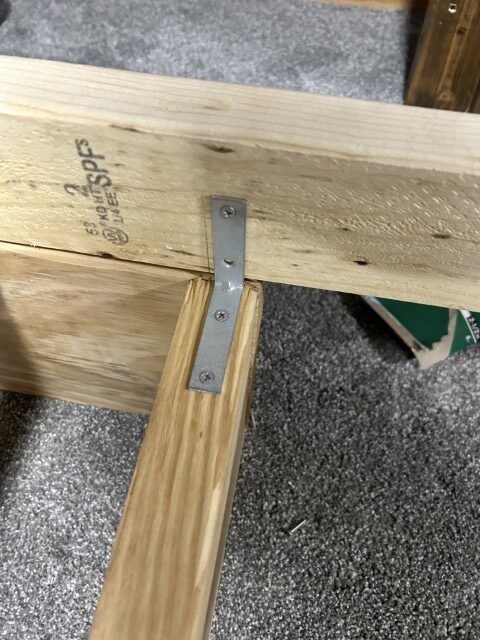
Floating Bed: Bracket Installation Close-Up

Floating Bed: Bracket locations

Floating Bed: Bracket locations
Once you have all the brackets screwed in place, attach a 1×4 to the front of the bedframe to connect the bottom base and the bed frame.

Floating Bed: Use 1×4 to connect bottom base to bed frame at the front (headboard side)
Step 9: Attach the Finished Edge Pieces to the Frame
We are ready to attach the finished edge pieces to the frame. Be sure you use a level to get everything perfectly aligned. We screwed the edge pieces on from the inside, so there would not be screw holes showing on the visible finished pieces. Just be sure you use screws that will not go all the way through your finished boards.
Floating Bed: Adding the finished edge pieces
Floating Bed: Finished Pieces all attached!
Step 10: Attach the Floating Bed Frame to Headboard
If you have a headboard that you are going to attach your floating bed frame to, now is the time to do that. (If you like this headboard, check out my DIY Headboard post (coming soon) to learn how to build it!)
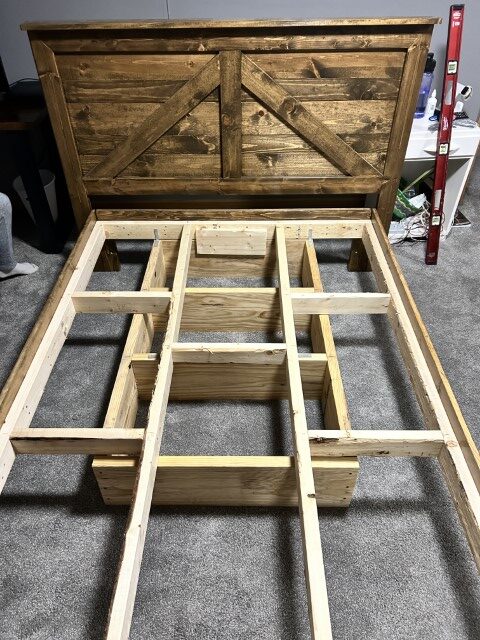
Floating Bed: Floating Bed Frame now attached to headboard
Step 11: Add LED Lights to your Floating Bed
If you are planning to add LED lights to your floating bed, it is easiest to add them at this step.
Here are my favorite LED lights that you can get for really cheap on Amazon! I have had great luck with these LED lights.
A couple of things to note about adding the LED Lights to your floating bed base.
- LED Light Control Box Placement: Make sure you place your LED light control box on the edge of the bed that will be visible. You will need to be able to point your LED remote at the control box to control the lights. So, you don’t want to place it in a place that you can’t see, or get to. Also keep in mind location to an electrical outlet, so you don’t have to use an extension cord, if possible.
- LED Lights: I recommend 50 feet of adhesive LED lights. For a full size floating bed frame, this allows the LED lights to go around the bottom base 3.5 times. In my opinion, this emits the perfect amount of light.
- Attaching the LED Lights: The lights should be attached to the bottom base. I recommend putting them at the very top of the base board, so they are not visible. We installed them with about 1/2″ between each row as you can see in the photo below.
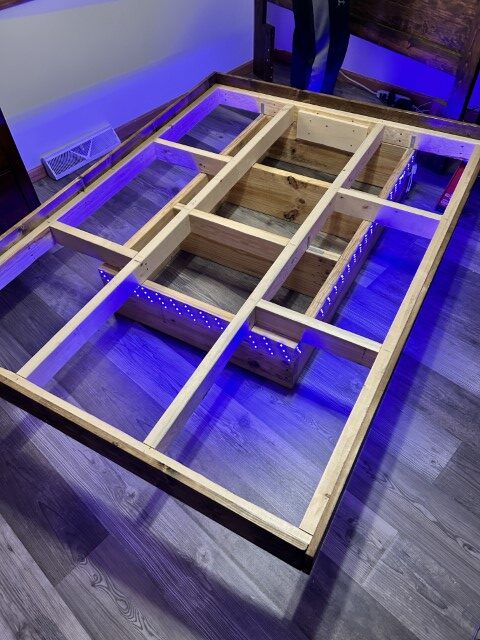
Placement of the LED lights on the floating bed bottom base
Step 12: Attach the Slats to the Floating Bed Frame
Evenly space out the slat boards, and screw them to the bed frame.
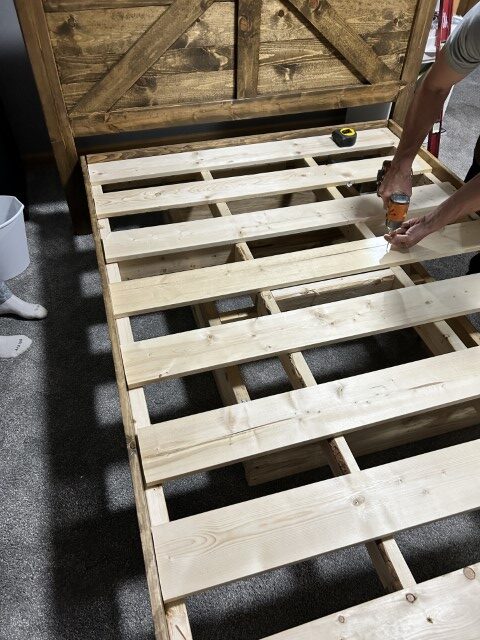
DIY Floating Bed: Screw the slat boards to the bed frame.
Step 13 (FINAL STEP): Put the Mattress in Place and ENJOY!
Final step, put your mattress on and don’t forget to make your bed! 😉
As I mentioned at the beginning of this post, I made TWO floating bed frames. We only had one strand of LED lights, so my daughter’s doesn’t have the lights added yet. Check out these completed photos of our DIY floating beds with LED lights!
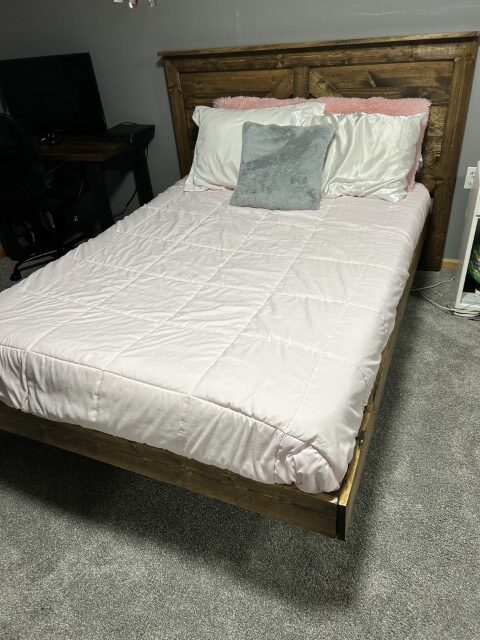
DIY Floating Bed Photo 1
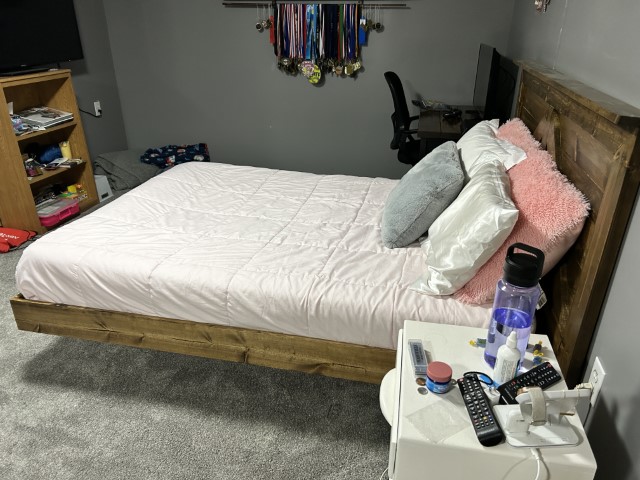
DIY Floating Bed Photo 2 – (See all those medals hanging on the wall in the background? Check out this really cool DIY Medal Hanger and Trophy Display that I also made for my kids!)

DIY Floating Bed with Lights – Completed Photo 1
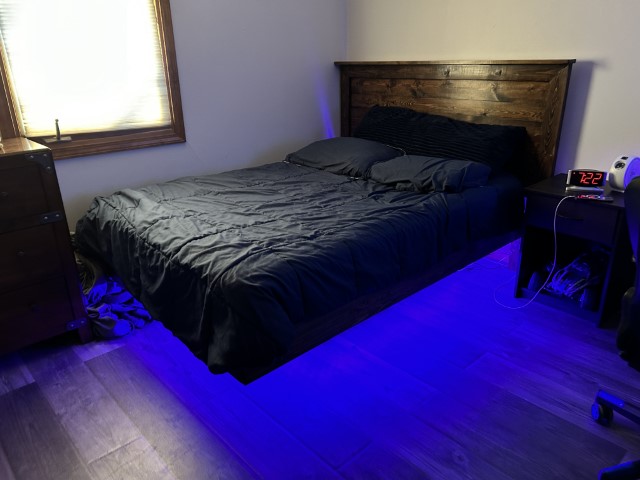
DIY Floating Bed with Lights – Completed Photo 2
DIY Floating Bed with Lights: Final Thoughts
I really loved this project, and I really love how both floating beds turned out. It really looks like the bed is levitating! At less than $150 in supplies for each floating bed, you really can’t beat it! If you like the headboards on either of these beds, be sure to check out my DIY Headboard post (coming soon), for more details on how you can make your own headboard too!
Not Ready to Build a Floating Bed Frame? Check Out My Favorite Floating Bed Frames on Amazon!
If after reviewing this DIY floating bed frame tutorial, you don’t think this project is something you want to attempt, then consider purchasing a floating bed frame, instead! There are some really cool and affordable floating bed frames available on Amazon.
Here are some nice Floating Bed Frames available on Amazon.
Shop this Post
Quick access to all products referenced in this post!
If you decide to build a DIY lighted floating bed, we would love for you to share your experience! Drop us a comment below!
Now you should know how to build a DIY floating bed with lights for under $150!

Other posts you may like:
- DIY Custom Medal Hanger & Trophy Display
- How to Build a DIY Garage Batting Cage
- Our Super Rad DIY Backyard Halfpipe (Mini Ramp)
- DIY Modern and Trendy DIY Guitar Wall Rack for under $25
- DIY Easy Whitewash Brick Fireplace
- Pleat Perfection: A Simple No-Sew Approach to Add Pleating Tape to Curtains
- The BEST Black Paint – BEHR LIMOUSINE LEATHER
Affiliate Disclosure: This post may contain affiliate links. If you buy through them, I may earn a commission at no extra cost to you.
Amazon Affiliate Disclosure: living-savvy.com is a participant in the Amazon Services LLC Associates Program, an affiliate advertising program designed to provide a way for websites to earn advertising revenues by advertising and linking to Amazon. For more information please refer to the Disclaimer, Terms and Conditions, and Privacy Policy.