
Affiliate Disclosure: This post may contain affiliate links. If you buy through them, I may earn a commission at no extra cost to you. For more information please refer to the Disclaimer, Terms and Conditions, and Privacy Policy.
In this post you will learn how to build a DIY Guitar Wall Rack.

Check out this guide on how to build a stylish and modern DIY guitar wall rack for just under $25! This wall mounted guitar rack is not only budget-friendly but also a great space-saving solution. With just a few simple steps, you can create a cool and functional guitar shelf that will add a touch of elegance to any room. #diyguitarwallmount #GuitarWallRack #GuitarHanging #GuitarDIYRack
Learn how to build a DIY Guitar Wall Mount.
See below for the tutorial to make a DIY guitar wall rack.
DIY Guitar Wall Rack Supplies List
Here are all the supplies you’ll need for this project:
- Board : I went to Home Depot and bought a 1″x 8″ common board that was precut to 4′ in length. The board cost around $9. Here is a link to a similar board at Home Depot: Common Board
- Guitar Hooks: For the hooks, I purchased these really nice black metal guitar hooks from Amazon: https://amzn.to/3O4IFFb. I got the rectangle shape, but they also come in a guitar shape here: https://amzn.to/3S2JgrU. Either option was around $14.

- Black Paint: Yay! An opportunity for me to brag about my favorite black paint! Seriously though, this black paint is beautiful and I use it for everything. The BEST Black Paint
- Paint Brushes: Regular paint brush and a foam paint brush (I’ll explain why you need both later)
- Sand Paper
Those are basically the only supplies you’ll need to build this guitar wall rack. Let’s get started!
DIY Guitar Wall Rack Tutorial
Step 1: Prepare the Board
I sanded all the edges of the board really nice and slightly rounded them, to make sure there weren’t any sharp edges. I also sanded the front of the board nice and smooth. Taking the time in the first step to sand the board, pays off in how the paint looks on it in the end. So, I really encourage you to take the time to sand the board.
Step 2: Paint the Board
After you have the board sanded, you are ready to paint the board. You can paint the board any color you want, but if you go with black like I did, I highly recommend you paint the board with my two-brush technique. It’s a little trick I use when painting furniture, and other projects where I want a flawless finish. Remember the supplies list, where I mentioned you need two paint brushes? Here’s where you utilize those brushes. First, brush on the black paint pretty thick with the normal paint brush, and then immediately brush over it with the foam brush. You are basically using the foam brush to smooth out the paint.
Step 3: Plan the Guitar Hook Spacing
You could wait to do this until you attach the board to the wall, but I find it easier to do beforehand, so you can lay out the guitars on the floor and move things around as needed. So, all you need to do is lay the board on the floor and then get the guitars you plan to hang and lay the hooks out and “mock” hang the guitars. Once you get the hooks placed and spaced out how you want them, simply mark the screw holes for each guitar hook.
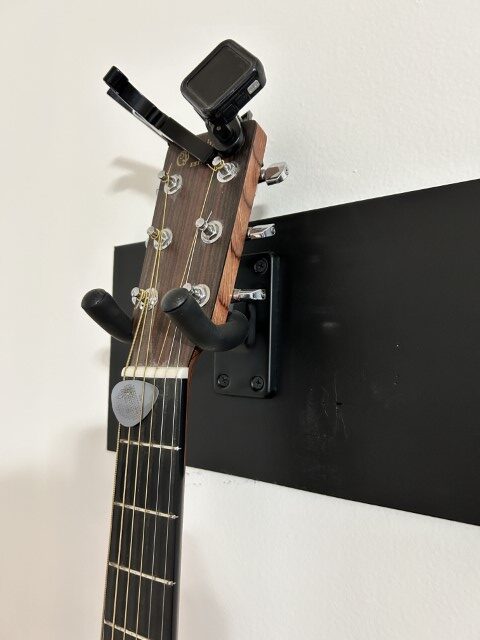
Step 4: Attach the Board to the Wall
You’re ready to attach your guitar wall rack to the wall! Nothing major here. I just simply found the studs in my wall, and drilled screws directly through the board into the wall studs.
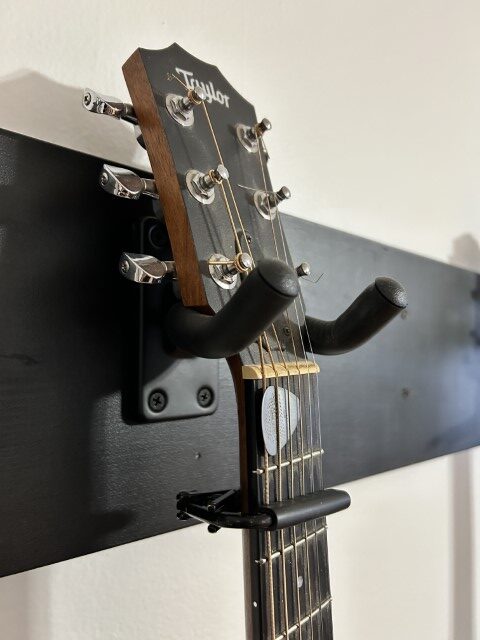
Step 5: Attach the Guitar Hooks to the Board
The final step is to attach the guitar hooks to the board. If you followed Step 3, then you should already have all the screw holes marked, and all you have to do is use a drill to attach the guitar hooks. Note: Since my board is only 1″, I went ahead and used longer screws, so they went all the way through the board and into the wall behind. No worries…I’m not planning to move this thing! 😎
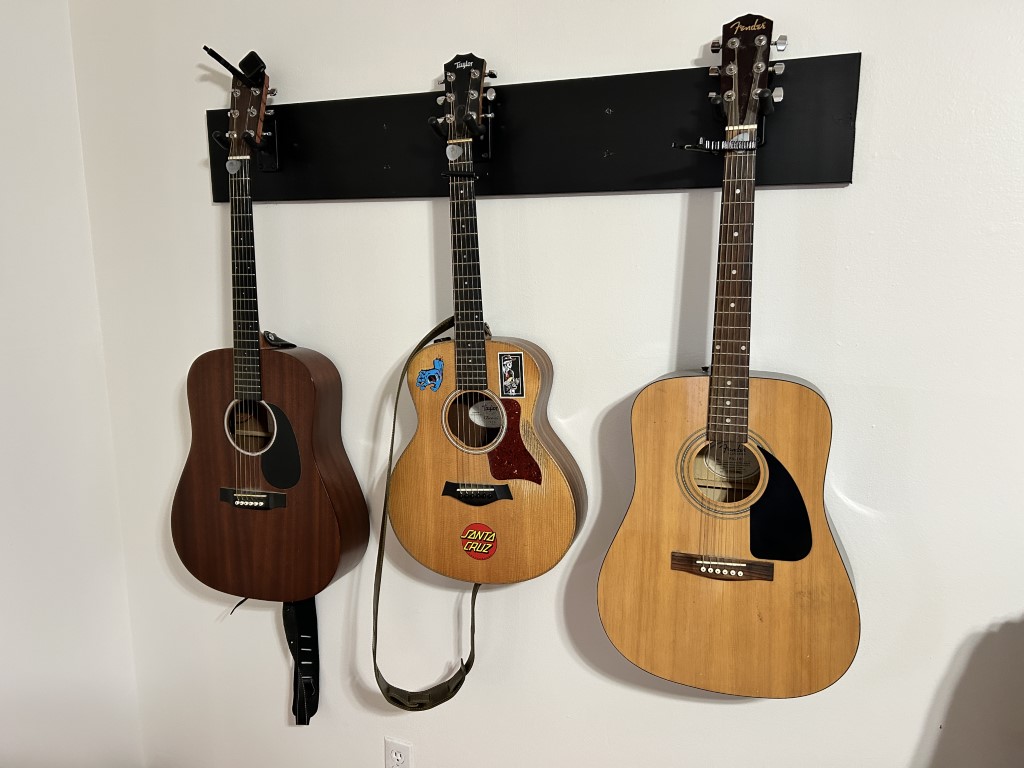
I’m very happy with how it turned out, and for under $25 you can’t beat it!
For other guitar lovers, I recently purchased a really cool custom personalized guitar strap from Etsy. You can basically have anything you want written on the leather. Here is the link to the custom guitar strap I ordered from Etsy: Personalized Guitar Strap. Shipping took quite a long time, but it was worth the wait!
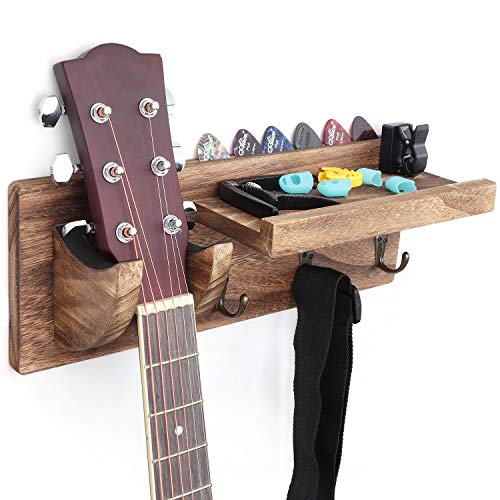
Just for fun, here are a few of the guitar wall racks and stands that I was inspired by, but were not quite what I wanted!


#BuildGuitarWallRack #GuitarWallHanger #GuitarWallShelf
What do you think? Are you going to give it a try? We’d love to hear from you. Comment below with your experience building a DIY Guitar Wall Rack.
This post was all about how to build a DIY Guitar Wall Rack.
Other posts you may like:
- Gifts for Guys: The Ultimate Gift Guide for Men/Boys 2024
- DIY easy whitewash brick fireplace
- Pleat Perfection: A Simple No-Sew Approach to Add Pleating Tape to Curtains
- How to Build a DIY Floating Bed With Lights
- Top 100 Gifts for Women
- Best Gifts for Teen Boys
Affiliate Disclosure: This post may contain affiliate links. If you buy through them, I may earn a commission at no extra cost to you.
Amazon Affiliate Disclosure: living-savvy.com is a participant in the Amazon Services LLC Associates Program, an affiliate advertising program designed to provide a way for websites to earn advertising revenues by advertising and linking to Amazon. For more information please refer to the Disclaimer, Terms and Conditions, and Privacy Policy.